
Your iPhone 18 Pro Max has something that was once associated almost exclusively with dedicated cameras: a physical, mechanical aperture that can change the amount of light entering the lens and influence how much of a scene stays in focus.
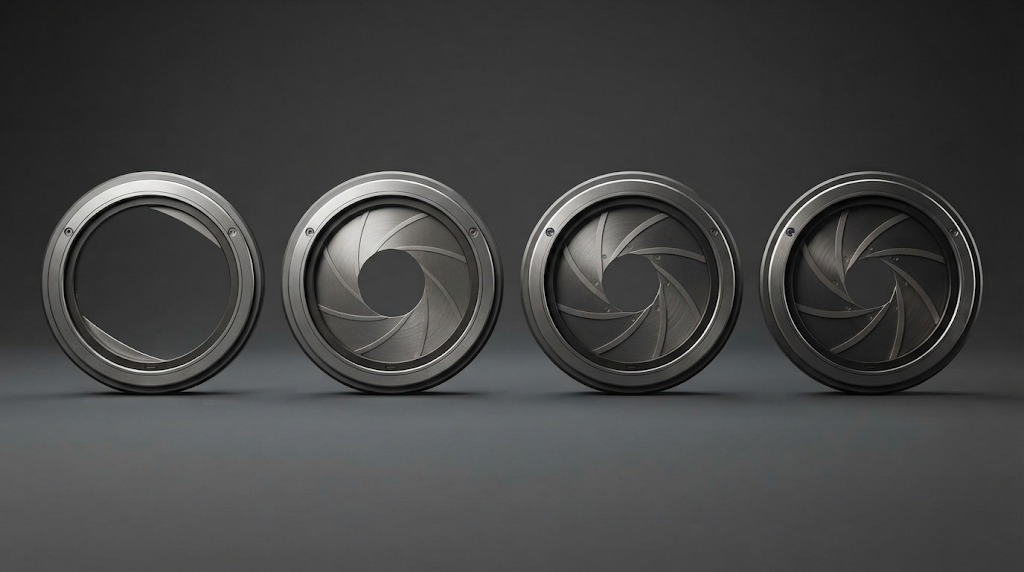
Inside the 48MP Fusion Main camera, six precisely cut blades move to create different aperture openings. Apple lists four settings: ƒ/1.48, ƒ/1.8, ƒ/2.8 and ƒ/4.0.
That sounds impressive. But what does it actually mean when you are taking a photograph?
Should you use ƒ/1.48 for every picture? Does ƒ/4.0 make landscapes sharper? Can changing the aperture give you a naturally blurred background without relying entirely on Portrait mode?
These are the questions that matter.
Apple explains that the variable aperture improves low-light photography and gives users more control over depth of field. What is missing from a typical product description is the practical explanation: what each setting does, when to choose it and when leaving the camera alone is the better decision.
Let’s make sense of it.
What an aperture actually is (in 60 seconds)
Think of the aperture as the opening in the middle of a camera lens.
Imagine looking through a window with adjustable blinds. When the blinds open wider, more light enters the room. When they close, less light gets through.
A camera aperture works on a similar principle.
It controls the size of the opening through which light passes before reaching the camera sensor.
In photography, aperture is expressed using an ƒ-number, such as ƒ/1.48 or ƒ/4.0. This is where the numbering can feel counterintuitive:
A smaller ƒ-number means a wider opening. A larger ƒ-number means a narrower opening.
So:
- ƒ/1.48 has the widest opening on the iPhone 18 Pro Max’s Main camera.
- ƒ/1.8 is slightly narrower.
- ƒ/2.8 is narrower still.
- ƒ/4.0 has the smallest opening of these four settings.
There are two important consequences.
First, aperture controls light. A wider opening lets more light reach the sensor. This is particularly useful when photographing indoors, at night or in other dim environments.
Second, aperture influences depth of field. Depth of field describes how much of a photograph appears acceptably sharp, from the foreground towards the background.
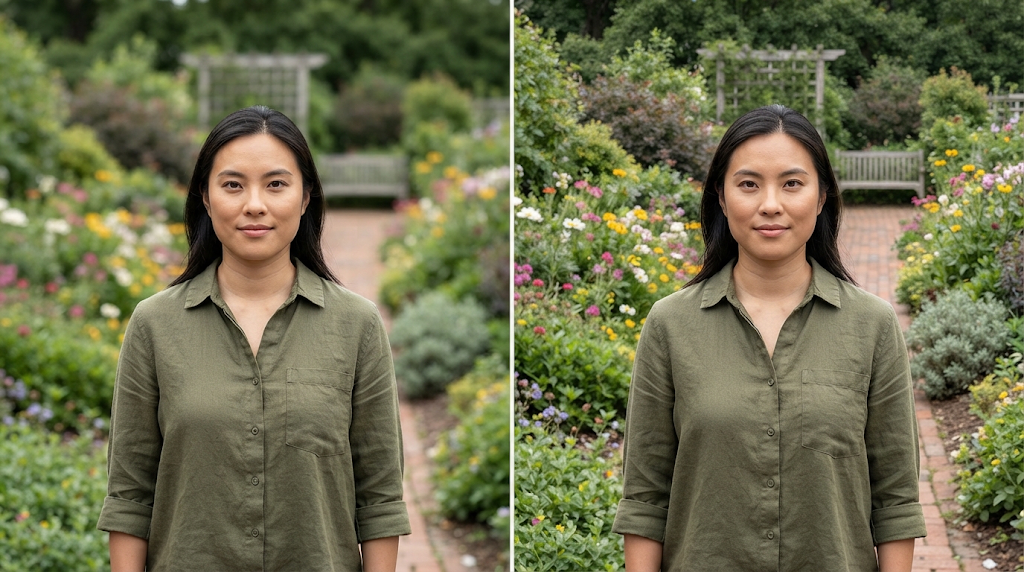
A wider aperture generally produces a shallower depth of field. A narrower aperture generally increases the depth of field.
For example, imagine photographing a person standing in front of a garden.
With a wider aperture, the person can stand out more clearly from the background. With a narrower aperture, more of the garden behind the person may remain recognisable and sharp.
That is the basic idea: aperture gives you control over both the light entering the camera and the depth of the scene you want to keep in focus.
Knowing what your camera can do is important, but knowing what not to do matters just as much. Here are the mistakes that prevent you from getting the most out of your camera.
Why a mechanical aperture is different
This is the most important part of the explanation.
Smartphone cameras have offered background blur for years. Portrait mode, for example, can make a person appear sharp while the background looks out of focus.
But there is a difference between creating a blur effect in software and changing the physical aperture of a lens.
Discovering this feature is a good reminder that your iPhone camera has more to offer than its default settings. If you’re not sure where else to start, explore these camera settings worth changing on your iPhone.
Software blur: creating the appearance of shallow depth of field
When you use Portrait mode, the phone uses computational photography to identify the subject and separate it from the background.
It then applies a blur effect to parts of the image that it estimates should be out of focus.
The result can look convincing, but the blur is being created or adjusted computationally. The camera is not necessarily changing its physical aperture to produce that effect.
This is why software-generated blur can sometimes struggle around complicated edges, such as hair, glasses, leaves or objects crossing in front of the subject.
Mechanical aperture: changing what the lens physically does
The iPhone 18 Pro Max takes a different approach with its Fusion Main camera.
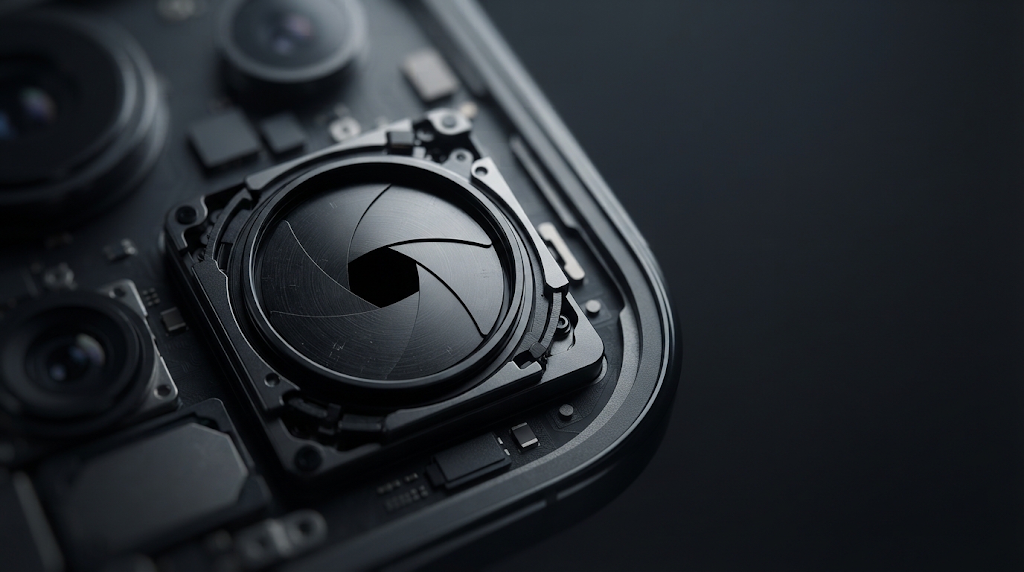
Its variable aperture uses six physical blades controlled by a rotor mechanism. The blades move to change the size of the opening through which light passes.
This means that selecting ƒ/1.48, ƒ/1.8, ƒ/2.8 or ƒ/4.0 changes the optical behaviour of the camera before the image reaches the sensor.
You are not simply asking the phone to imitate the appearance of a different aperture. You are changing the actual opening in the camera’s optical system.
That distinction matters.
A physical aperture affects how much light enters the camera and how depth of field is captured. Computational photography can still contribute to the final image, but it is not the same thing as asking software to paint a blurred background onto a photograph.
There is one important qualification: the iPhone’s relatively small camera sensor and lens system do not behave exactly like a large DSLR or mirrorless camera. You should not expect identical background blur or depth-of-field effects. The advantage is that you now have genuine optical aperture control in a smartphone camera, rather than relying exclusively on simulated blur.
And that is what makes this feature worth learning.
While this feature can be useful in the right situation, there’s another setting that deserves your attention because it can influence the results you get from everyday photography. Find out about the setting that can make a difference to image quality.
The four aperture settings and when each one wins
The iPhone 18 Pro Max gives you four aperture settings on its Fusion Main camera. Each has a different purpose.
Let’s look at what happens when you choose each one.
ƒ/1.48 — Maximum light for darker environments
<escape>ƒ/1.48</escape> is the widest aperture available on the Main camera.
Because the opening is at its largest, more light can reach the sensor. This makes it particularly useful when photographing in dim environments.
Think about taking pictures at:
- A restaurant with soft indoor lighting.
- A family gathering in the evening.
- A street with limited lighting.
- An indoor event where using flash would be distracting.
- A room where you want to preserve the natural atmosphere.
Apple describes ƒ/1.48 as offering around 50% better low-light performance compared with ƒ/1.8. This is a useful distinction: the comparison is with ƒ/1.8, not with every other aperture setting.
The wider opening also produces a shallower depth of field than the narrower settings, all else being equal. That can help separate a nearby subject from the background.
When to choose it: Use ƒ/1.48 when light is limited and you want the camera to gather as much light as possible.
One caution: a wider aperture does not automatically freeze movement. If someone is moving quickly, shutter speed still matters. Aperture is one part of exposure, not a replacement for the other camera controls.
ƒ/1.8 — A versatile setting for everyday portraits
<escape>ƒ/1.8</escape> is the default aperture Apple identifies for the Main camera.
It offers a useful balance between light gathering and depth of field.
For everyday photography, this is a sensible place to start when you are photographing one person, a pet or another nearby subject.
Consider a portrait of someone sitting at a café table. You want the person’s face to be the centre of attention, but you also want enough of the surroundings to remain visible to give the photograph context.
ƒ/1.8 gives you a practical middle ground between the widest setting and the narrower apertures.
It is also useful when you want a little more separation between your subject and the background without making the entire scene look excessively soft.
Remember that the final appearance depends on more than aperture. Your distance from the subject, the distance between the subject and the background, and the camera’s focal length all influence how much separation you see.
When to choose it: Start with ƒ/1.8 for individual portraits and everyday photographs where you want a balance of subject separation and background detail.
ƒ/2.8 — More depth for groups and layered scenes
At <escape>ƒ/2.8</escape>, the aperture is narrower than ƒ/1.48 and ƒ/1.8.
Less light enters the camera, but more depth of field can help keep details at different distances acceptably sharp.
This is useful when photographing more than one person.
Imagine a group photograph with three people standing at slightly different distances from the camera. With a shallower depth of field, one person may appear sharper than another, depending on their position.
A narrower aperture can help increase the range of the scene that appears in focus.
It is also useful for photographs with several important elements at different distances, such as a person standing beside a display, a table arrangement or a layered street scene.
When to choose it: Try ƒ/2.8 when photographing small groups or scenes where you want more detail to remain sharp beyond the nearest subject.
For larger groups arranged in several rows, ƒ/4.0 may be a better starting point. You should still check the result rather than assuming one setting guarantees that everyone will be in focus.
ƒ/4.0 — Maximum depth for scenes with more detail
<escape>ƒ/4.0</escape> is the narrowest of the four available settings.
It lets in less light than the other options, but it provides the greatest depth of field among these four settings.
This makes it useful when you want more of the scene to remain acceptably sharp.
Think about photographing:
- A landscape with foreground and distant scenery.
- A building where architectural details matter.
- A street scene with several layers of activity.
- A group arranged across different distances.
- A table or product arrangement where several objects need to remain clear.
There is another creative benefit. Apple specifically highlights the possibility of creating a starburst effect around bright light sources when using ƒ/4.0 manually.
You may notice this around streetlights or other bright points in a darker scene.
However, there is a trade-off. Because ƒ/4.0 allows less light through the lens, the camera may need to compensate through other exposure settings. In low light, that can make it harder to photograph moving subjects sharply.
When to choose it: Use ƒ/4.0 when you want maximum depth of field, particularly for landscapes, architecture and detailed scenes.
The one-line rule for each situation
You do not need to memorise every technical detail before using variable aperture.
Start with this quick-reference chart.
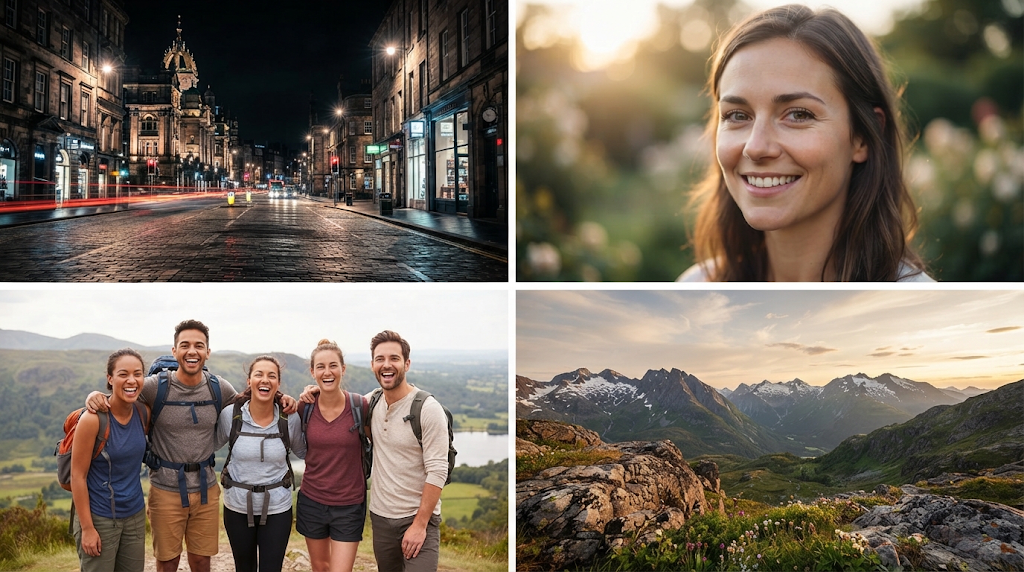
| Photography situation | Starting aperture | Why |
|---|---|---|
| Night and dim indoor scenes | ƒ/1.48 | Allows the most light into the camera |
| One person or an individual portrait | ƒ/1.8 | Balances light and subject separation |
| Small groups and layered scenes | ƒ/2.8 | Provides more depth of field |
| Landscapes and architecture | ƒ/4.0 | Provides the greatest depth of field |
Treat these as starting points, not unbreakable rules.
For example, you might photograph a person outdoors in bright sunlight and prefer ƒ/2.8 because you want more of the surroundings to remain sharp. You might also photograph a landscape at ƒ/2.8 if the light is fading and you do not want to use ƒ/4.0.
The subject, lighting and intended result should guide your choice.
The simplest way to remember the relationship is:
Wider aperture = more light and less depth of field.
Narrower aperture = less light and more depth of field.
That single distinction will help you make better decisions with all four settings.
Now that you understand this lesser-known capability, you can start exploring other ways to get more from your device. Here’s how to get more out of your iPhone camera.
Where to find variable aperture on the iPhone 18 Pro Max
Knowing what aperture does is one thing. Finding the control is another.
The iPhone 18 Pro Max makes aperture available through its customisable Pro Controls experience in the Camera app.
Here is the general route:
- Open the Camera app.
- Open the Camera controls.
- Look for the Pro Controls customisation options.
- Add Aperture to the controls you want quick access to.
- Return to the camera view and select the aperture value you want to use.
Once the control is available, you can choose between ƒ/1.48, ƒ/1.8, ƒ/2.8 and ƒ/4.0 when using the Fusion Main camera.
<em>Note:</em> Apple’s Pro Controls are customisable, so the precise on-screen arrangement can depend on how you have configured the Camera app and your iOS version. If you cannot immediately see Aperture, check the Pro Controls customisation options.
Also remember that this variable aperture belongs to the 48MP Fusion Main camera. It is not a universal aperture control that changes every rear camera lens.
If you switch to another camera, such as the Ultra Wide or Telephoto camera, do not assume that the same four aperture choices will be available.
When not to use manual aperture
Here is something worth saying clearly: you do not need to manually change aperture for every photograph.
The iPhone 18 Pro Max is designed to make many camera decisions automatically. Apple says its variable aperture can adjust automatically to improve lighting and depth of field.
For everyday photographs, automatic control is often perfectly adequate.
If you are taking a quick photograph of your lunch, capturing a passing moment with friends or photographing something you do not want to miss, spending time adjusting aperture may not improve the result.
Manual aperture becomes useful when you have a specific creative intention.
For example:
- You are photographing a person and want to control how much of the background remains sharp.
- You are taking a group photograph and want more depth of field.
- You are photographing a landscape and want more of the scene to remain in focus.
- You are working in dim lighting and want to prioritise light gathering.
- You want to experiment with the starburst effect around bright light sources.
In these situations, manual control gives you a deliberate choice rather than leaving every decision to the camera.
There is also a practical consideration: aperture is only one part of exposure. Shutter speed and ISO influence the final result too. If you narrow the aperture in a dark environment, the camera may need to compensate by changing another exposure setting.
That is why you should evaluate the photograph as a whole rather than assuming that a particular ƒ-number will always produce a better image.
The goal is not to use manual controls as often as possible. It is to understand them well enough to know when they will make a meaningful difference.
You own a camera feature worth understanding
The variable aperture on the iPhone 18 Pro Max is more than another specification to mention when comparing phones.
It gives you physical control over the opening in the Fusion Main camera’s lens. That affects how much light enters the camera and how much of the scene can remain in focus.
Once you understand the four settings, the decisions become much easier:
- ƒ/1.48: Prioritise light.
- ƒ/1.8: Photograph one person with a balanced look.
- ƒ/2.8: Bring more depth into group and layered photographs.
- ƒ/4.0: Keep more of a detailed scene in focus.
You do not have to become a professional photographer to benefit from this feature. You simply need to understand what the controls do and when to use them.
You own hardware that gives you a level of optical control many smartphone users have never had. Now you know what it does.
Want to get more from every camera control on your phone?
Mastering the iPhone 18 Pro Max Camera takes you beyond the specifications and explains how to use the camera’s features in real shooting situations. From exposure and focus to composition, low-light photography and variable aperture, the guide helps you understand not just which settings exist, but when and why to use them.
Want to understand more of your iPhone’s advanced camera controls?
Variable aperture is just one of the features that becomes more useful when you understand the photography principles behind it. Focus, exposure, shutter speed, white balance and lens selection all influence the photographs you create.
Mastering the iPhone 18 Pro Max Camera: A Practical Guide to Better Photos, Stunning Videos, and Confident Camera Control explains these features in a practical, step-by-step format.
You’ll learn how to use your camera’s everyday settings, explore advanced controls, photograph different subjects, record better videos and edit your images.
The guide also includes practical exercises, troubleshooting guidance and quick-reference tips to help you apply what you learn.
Explore the book: Mastering the iPhone 18 Pro Max Camera